


BUT...I didn't want to pay the price I am seeing them sell for on sites like Etsy. Not when I know I have the tools and the ability to at least give it a try myself. So that's what I did this weekend! And here is our door today.......

I LOVE LOVE LOVE it! So, I wanted to tell you all that you can make one yourself. If you have the correct tools, this is not hard to do. It does take time and patience. So, how to do it? Here is what I did. {Warning: the photos I took were not of my original above. I did one for one of my daughters today and took pictures since I didn't remember to do them the first time. Just didn't want it to confuse y'all!}1. You need to download the font called KK Monogram to your computer. It can be found at DaFont.com.
2. I used Microsoft Publisher to create the monogram. You can create individual text boxes and move them around so that the letters touch each other. This is important to make the monogram all one piece. I used about a size 300/bold font for the middle letter and a bit smaller for the side letters. The initials I used: the C in the middle is our family name, and the smaller C and A on the sides are for my first name and hubbie's first name. When the monogram was complete, I saved it as a pdf file on a jump drive.
3. The next step involves enlarging the monogram. Because I am an elementary school assistant principal, I have access to bulletin board paper and a projector. I taped the paper to a wall and shined the monogram via the projector onto the paper. I made mine about 20 inches tall by 24 inches wide and I traced it. Here is a what it looks like....this one is a different one I am making for one of my daughters. This may be difficult to see....but hopefully you can get the idea. :)


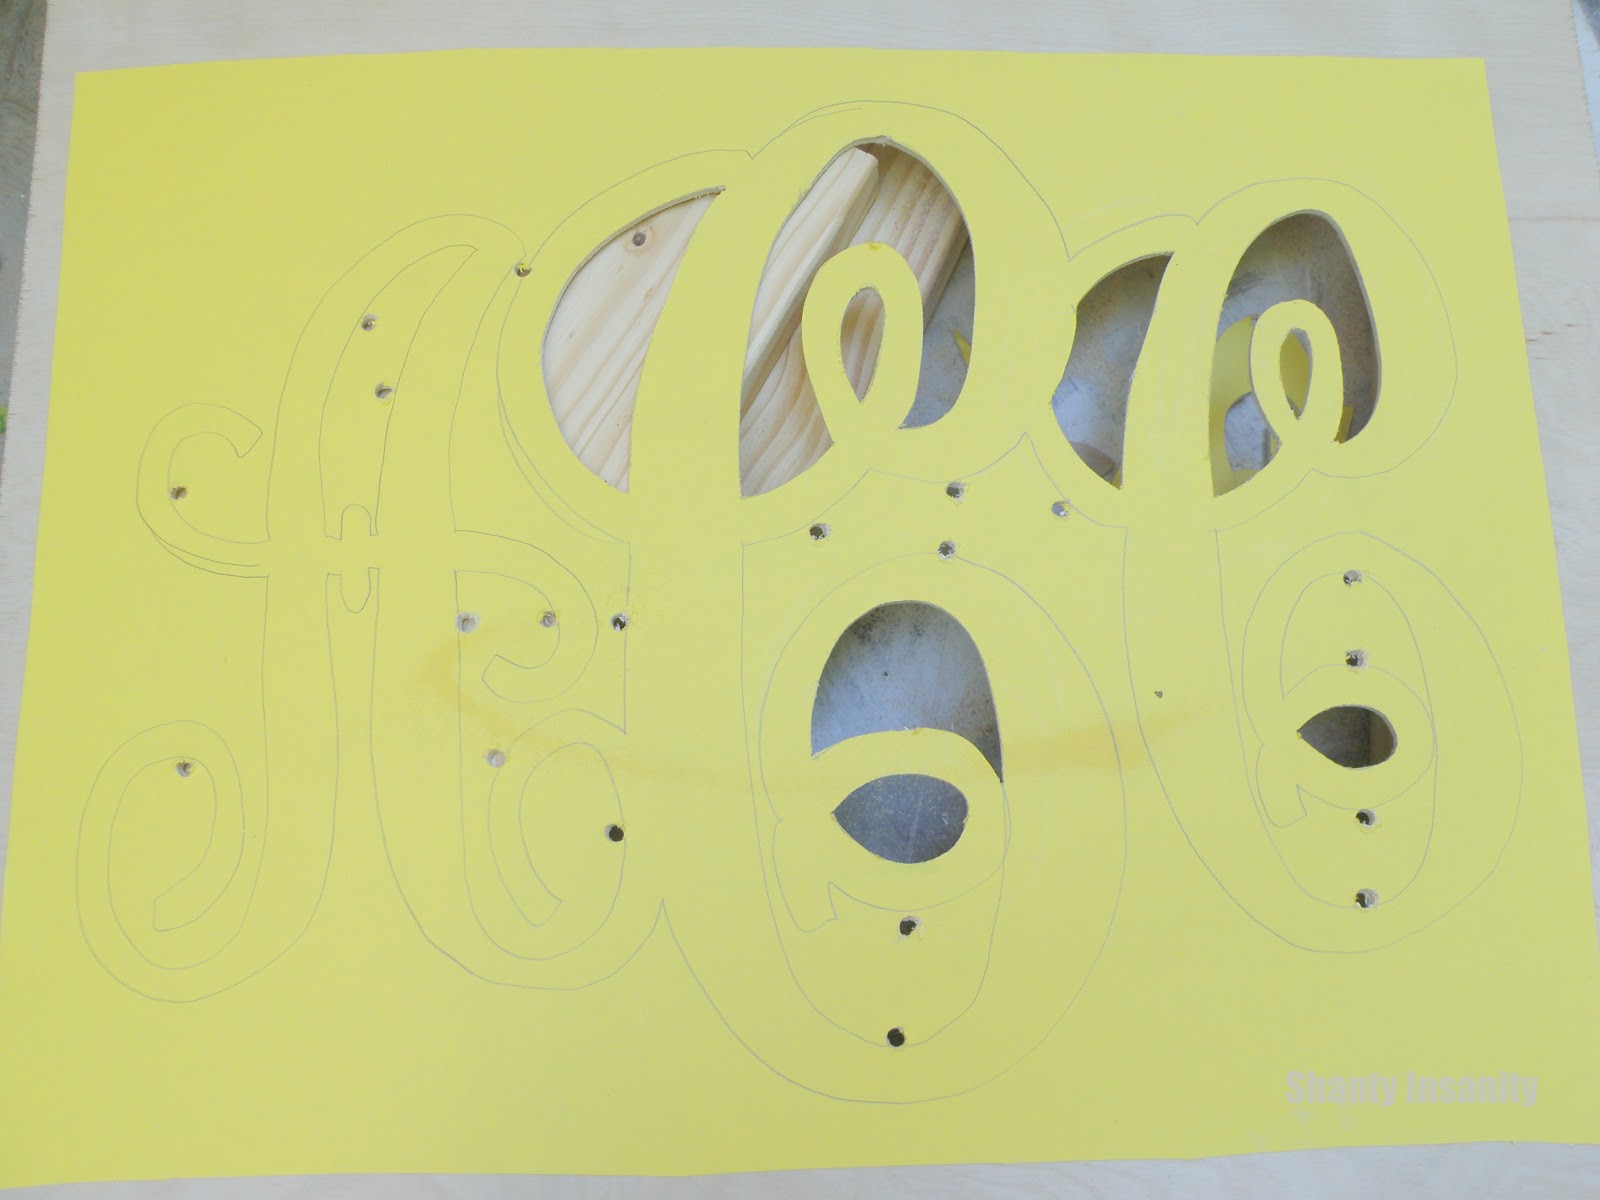
5. I used spray adhesive on the back of the paper and stuck it to the board. Word of caution here...I used way too much on my first one and ended up having to sand off a lot of the paper. The second time, I used less and it worked great! I was able to peel off the paper from the wood once it was all cut out.6. Then I used a drill to drill pilot holes to have a place to insert the saw blade. This picture shows you the paper stuck to the board, some of my pilot holes and also some of the pieces already cut out.


So here is the one on our front door again. You can see I added a burplap ribbon bow and it was ready to hang!


This one took way more time. The one I made today for my daughter took about 2 hours, start to finish. I suppose it is like anything else, the more you do something, the faster you go! Good luck to you should you decide to go for it!

Linking up to some great parties!


